
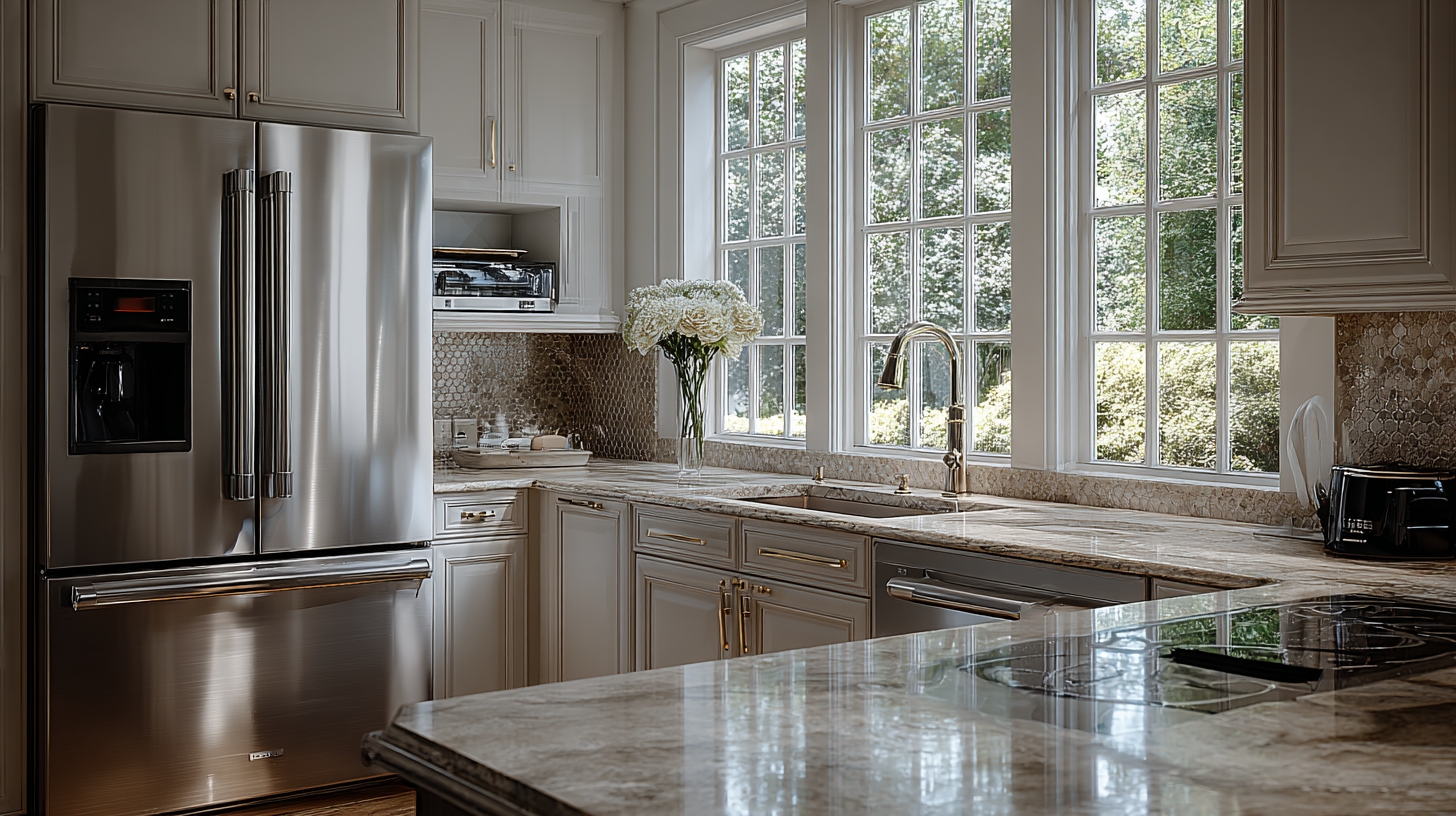
You know how a kitchen can look great in photos, then real life exposes the pinch points. Great kitchen design in the NYC Metropolitan Area starts with flow, storage, and safe clearances, then uses finishes to support the plan. If you want a fast visual reference while you plan, keep this modern kitchen design inspiration gallery open as a sanity check.
Many New York homeowners start a kitchen renovation and then feel stuck because wasted space, odd layouts, and poor storage show up fast once cabinets are on order.
I’m Alex Fedin, a licensed NYC general contractor and founder of HomeRenovation4U, and I’ve seen the same pattern since 2000: the “pretty” choices are easy, the functional choices decide whether you love your kitchen designs for years.
So I’m going to walk you through seven rules we use on real projects: workflow, storage, timeless looks, layout, lighting, durable materials, counter space, future-proof planning, and the non-visual details that make a kitchen feel calm.
Key Highlights
- Use the work triangle as a baseline: keep sink, cooking, and refrigerator runs in the 4 to 9 ft range, with a total travel distance no more than 26 ft (a common NKBA guideline).
- Design by zones, then protect “landing areas” so you always have a safe spot to set groceries, hot pans, and dishes (NKBA lists 15 in as a common minimum beside many appliances).
- Plan clearances early: many designers target 42 in work aisles for one cook and 48 in for two cooks, plus enough room for dishwasher and oven doors to open without blocking traffic.
- For island seating, plan comfort like a dimension, not a guess: a typical target is 24 in of width per seat and about 15 in of knee space depth for counter-height seating.
- Future-proof the electrical plan: recent NEC updates expanded GFCI protection in kitchens, and most renovations benefit from dedicated circuits for high-load appliances (confirm local code enforcement before permitting).

Prioritize Workflow and Functionality
Good kitchen design puts workflow first, arranging appliances and prep areas so you move less and cook more. In NYC apartments and townhouses, one bad clearance can turn every meal into a shoulder-bump.
On my jobs, we map the room by tasks, test clearances at full scale, then refine the plan before we commit to cabinet sizes and plumbing locations.
Watch a quick workflow planning walkthrough
- Start with the “everyday loop”: unload groceries, prep, cook, serve, clean.
- Protect landing zones: you need countertop space beside the fridge, sink, and cooking surface so daily routines do not spill into aisles.
- Keep traffic out of the cook’s path: do not route the main walkway through your prep and cooking areas.
- Plan for doors: confirm dishwasher, oven, and fridge doors can open without blocking the work aisle.
- Test the plan: tape the island and key cabinet runs on the floor before final sign-off.
What is the kitchen design triangle, and why is it important?
The kitchen work triangle places the stove, sink, and refrigerator close together. Designers call it a “golden” starting point because it reduces back-and-forth when one person is cooking.
A common planning target is 4 to 9 feet for each leg, with a total travel distance between the three points no more than 26 feet, and you do not want big obstacles cutting through the triangle.
Pro check: if an island or peninsula sticks more than about 12 inches into a triangle leg, your “efficient triangle” usually turns into detours.
U-shaped and L-shaped layouts benefit most from the triangle. Galley kitchens can also be efficient if you keep the triangle tight and protect landing space.
In open-concept or larger kitchens, the triangle can lose effectiveness. That is when we shift to two-cook planning and workstation “zones,” so each cook has a prep area, a water source, and safe clearances.
How can I group kitchen items by tasks and zones?
I plan zones around tasks, not objects. In my experience, this is the easiest way to make modern kitchen design feel effortless day to day.
- Prep zone: keep knives, boards, mixing tools, and oils near your primary counter, and aim for real landing space beside the sink (NKBA commonly lists 24 inches on one side and 18 inches on the other).
- Cooking zone: store pans, utensils, and spices next to the range, and protect the cooking landing areas, many plans use 15 inches on one side and 12 inches on the other.
- Cleaning zone: keep trash, detergent, and dish tools within arm’s reach of the sink and dishwasher so cleanup does not spread across the room.
- Coffee and beverage zone: group mugs, pods, and a small fridge drawer if you have room, this frees the main triangle during busy mornings.
- Vertical zone: add tray dividers for sheet pans and cutting boards, plus a narrow pull-out for spices if your kitchen cabinet design has tight gaps.
- Storage zone planning: use deep drawers and pull-outs for heavy items, and if you want visual ideas for cabinet interiors, this smart kitchen cabinet design collection is a helpful reference.
Pro-tip: label these zones on your plan before you meet a kitchen designer, it speeds up decisions on cabinet sizes, fillers, and hardware.
Plan for Ample Storage
Storage is where NYC kitchens either shine or fail. If your kitchen interior design relies on countertops to hold appliances, the kitchen will feel messy even when it is clean.
Start with the items you use daily, then build cabinet interiors around access: deep drawers, pull-outs, and dedicated “homes” for awkward tools.
Watch a storage planning video
| Upgrade | What it solves | Best use in NYC kitchens |
|---|---|---|
| Deep drawers | Heavy items become one-step access | Pots, pans, small appliances, recycling bins |
| Full-height pantry (design of kitchen wardrobe style) | Consolidates food and broom storage | One tall cabinet can replace scattered uppers |
| Pull-out trays | No more crawling into base cabinets | Corner cabinets, baking storage, dish stacks |
| Appliance garage | Clears the counter while keeping tools plugged in | Coffee setups, toaster, blender, air fryer |
Why choose deep drawers over low shelves for kitchen storage?
Deep drawers hold bulky pots, pans, and mixers, and they reduce heavy lifting from awkward low shelves. Full-extension slides bring the drawer box to you, which cuts bending and makes organization easier.
When you store cast iron or stacks of dishes, hardware matters. For example, Blum’s MOVENTO undermount slides are commonly specified in custom work because the standard system is rated around an 88 lb dynamic load, and there are heavier-duty versions for oversized drawers.
Deep drawers change how a kitchen works because you can see and reach everything without kneeling or digging.
Add dividers for lids and utensils, and you keep drawers functional instead of turning them into a big bin. If you want kitchen design ideas that blend function with timeless style, this is often the first place to invest.
How do pull-outs and appliance garages improve storage?
After you choose deep drawers, add pull-outs and appliance garages to keep counters clear and tasks faster. Pull-out trays turn “dead” cabinet space into easy access, and they make kitchens feel bigger because you do not need to pull everything out to find what you need.
- Trash and recycling pull-out: puts the messiest task where it belongs, near prep and cleanup.
- Tray pull-outs: store baking sheets, cutting boards, and serving platters vertically.
- Blind-corner pull-outs: recover corner space that usually becomes a black hole.
- Appliance garage: hides toasters, blenders, and coffee makers while keeping them ready.
- Wall cabinet lift-up doors: reduce door interference in tight aisles.
If you are searching “kitchen designers near me” in the NYC Metropolitan Area, ask specifically about cabinet interior accessories, not just door styles.
Balance Aesthetics with Timeless Design
Timeless does not mean boring. It means you pick foundations that still look right after the trend cycle moves on, then you let “easy-to-change” finishes carry the personality.
Studio McGee often talks about leaning on three classics, materials, textures, and classical forms, and that lines up with what sells well and lives well in NYC homes.
In a recent National Association of Home Builders buyer-preference roundup, storage-forward features like pantries and eat-in kitchens still show up as strong crowd-pleasers, which is one more reason to design storage and seating with intention.
Watch a timeless design example
- Keep the “fixed” items classic: cabinet style, countertop, and floor.
- Changeable items can be bolder: paint, lighting, stools, and decor.
- Repeat finishes: pick one metal finish for most hardware, then add a second only if it is clearly intentional.
- Use texture for depth: matte tile, wire-brushed wood, or a honed stone look reads high-end without shouting.
How can I avoid overly trendy permanent kitchen fixtures?
My rule is simple: if it is expensive to replace, do not make it a short-term trend. Cabinet doors, countertops, and tile that require demolition deserve a longer runway than decorative pieces.
- Cabinet doors: Shaker and simple slab doors age well across most NYC apartment styles.
- Countertops: quartz and quartzite stay popular because they pair with both modern kitchen design and more classic spaces.
- Backsplash: keep it clean and easy to wipe, then use color through paint, art, or stools.
- Open shelving: use it in small doses, too much becomes daily maintenance.
If you want a kitchen designer to pressure-test your choices, bring a short list of “must-haves” and be clear about how long you plan to stay in the home.
What is the 60-30-10 rule for kitchen color schemes?
The 60-30-10 rule is a simple way to keep a palette balanced: 60% dominant color, 30% secondary color, and 10% accent color.
Put the dominant color on cabinets or large wall areas, use the secondary color on counters or tile, then add the accent through hardware, lighting, stools, or a small section of backsplash.
- Classic NYC: 60% warm white, 30% natural oak, 10% black.
- Soft modern: 60% light greige, 30% white, 10% brushed nickel.
- High contrast: 60% white, 30% charcoal, 10% brass.
Once the palette is set, layout and spacing keep it feeling calm instead of crowded.
Optimize Kitchen Layout
Pick an L-shape, U-shape, or galley layout that fits your home’s traffic pattern, then tune it with clearances. In NYC, the best layout is usually the one that protects the work aisle and keeps doors from colliding.
| Layout | Best for | Key planning note |
|---|---|---|
| L-shape | Open-plan apartments and medium rooms | Easy to add an island if you can keep a true work aisle |
| U-shape | Kitchens that need maximum storage | Great zone separation, watch corner and door interference |
| Galley | Narrow NYC kitchens | Very efficient, but you must control traffic through the aisle |
What are the benefits of L-shape, U-shape, and galley kitchen layouts?
L-shape kitchens fit many NYC footprints because they open sightlines and make social cooking easier. They also support strong zoning for prep, cooking, and cleanup.
U-shape plans give you abundant counter and storage, which helps kitchen cabinet design stay clean because tools have a real home. For many homeowners, this layout also makes it easier to create a dedicated beverage station outside the main cooking zone.
Galley kitchens excel in narrow units because they limit steps, which makes them great for functional kitchen designs. The tradeoff is that you have to plan door swings, appliance depths, and traffic so the cook is not trapped.
How much space is needed around kitchen islands?
After choosing a plan, confirm island clearances with real measurements. A common target is at least 42 inches between the island and perimeter counters, and 48 inches if two people cook at the same time.
For seating, plan space like a designer, not like a guess. Many NKBA-based seating guidelines use 24 inches of width per person and about 15 inches of knee space depth for counter-height seating, plus enough clearance behind stools so people can pass.
- Work aisle: 42 in minimum for one cook, 48 in for multiple cooks.
- Seating width: about 24 in per seat so elbows are not fighting.
- Behind seating: if people need to walk behind diners, plan wider clearance, many guidelines call out about 44 in for walk-by traffic.
I test these layouts with a kitchen design tool and on-site tape-outs before we order cabinets, especially in co-ops where you do not get a second chance without delay.
Invest in Quality Lighting
Lighting is safety, comfort, and mood in one decision. It also affects how your finishes read, which is why good lighting is part of kitchen design, not an afterthought.
See how lighting changes a finished kitchen
What is layered lighting and how does it work in kitchens?
Layered lighting mixes multiple types of light so the kitchen works at every hour. HGTV’s lighting expert Randall Whitehead often describes kitchens as needing more than one light source because no single fixture can handle every task.
- Ambient: your general ceiling light for the whole room.
- Task: under-cabinet or focused fixtures that light counters, sinks, and cooktops.
- Accent: inside glass cabinets, toe-kick glow, or wall-wash lighting.
- Decorative: pendants or a statement fixture that adds style.
In NYC renovations, I like separate switches (and dimmers) for each layer, so you can cook under bright task light and still keep a warm, calm feel at night.
How can I maximize natural light in my kitchen?
Natural light makes small kitchens feel larger. A Journal of Light Construction kitchen field guide uses a simple rule of thumb: aim for window and skylight area around 10% of the kitchen floor area (or the larger open-plan space that includes the kitchen).
- Reflect light: lighter cabinets, glossy tile, and polished metal bounce daylight deeper into the room.
- Use glass strategically: a glass pantry door or glass-front uppers can brighten dark runs without adding fixtures.
- Borrow light: if a full window is not possible, consider a transom opening or a widened pass-through to the living area.
If you use a kitchen design tool, test bright vs. dark finishes early. In NYC, darker palettes can look amazing, but they demand better lighting to avoid a cave effect.
Choose Durable and Comfortable Materials
Durability matters more in kitchens than almost anywhere else. You want materials that handle water, heat, and constant cleaning without turning into a maintenance project.
For countertops, many homeowners choose low-maintenance options such as durable countertops such as quartz, porcelain, or honed stone looks, because they keep the kitchen design looking sharp with less daily effort.
What are the best resilient flooring options like wood or cork?
NYC kitchens need floors that tolerate spills and chair scuffs, and they also need to feel good underfoot. If indoor air quality is a priority for your household, consider low-emitting flooring, FloorScore is one common certification that tests VOC emissions against California Section 01350.
| Flooring | Why people choose it | Watch-outs |
|---|---|---|
| Engineered hardwood | Real wood look with better stability than solid | Water still matters, wipe spills fast |
| LVP (luxury vinyl plank) | Very water-resistant and easy to clean | Ask for low-VOC certification and low-VOC adhesives |
| Porcelain tile | Durable, easy to sanitize, great with radiant heat | Hard underfoot, grout maintenance if not sealed |
| Cork | Comfortable and quieter in apartments | Needs proper sealing, can scratch |
Which countertop materials are low-maintenance and durable?
Quartz is a top low-maintenance choice because it is non-porous and easier to keep stain-resistant without routine sealing. Porcelain slabs are also popular for durability and heat resistance, and they can match a wide range of kitchen design decorating ideas.
Granite gives a classic look and strong heat resistance, but many stone installers still recommend periodic sealing based on the specific slab and finish, so ask what maintenance your exact stone needs before you buy.
My practical advice: decide how you actually cook, then pick the material that supports that habit. If you fry often or cook at high heat, protect the cooking zone with real landing areas and an easy-to-clean backsplash.
Free Up Counter Space
Clear counters make cooking calmer, and they make kitchen cabinet design look intentional. They also give you room for prep, which is where most kitchens feel tight.
NKBA planning materials commonly cite a total countertop frontage target of 158 inches (at 24 inches deep) to cover landing, prep, and storage needs, and many NYC kitchens do not have that much, so you have to earn every inch you do have.
How can I minimize clutter by storing small appliances?
Clear counters matter most after renovations because that is when homeowners expect the space to feel “done.” These are the moves that work best in NYC kitchens.
- Appliance garage: hide your daily tools behind a door, and keep them near the outlets you actually use.
- Pull-out shelves: store heavier appliances at waist height inside a base cabinet, so you slide them out instead of lifting.
- Dedicated charging spot: add a drawer insert or cabinet cubby for cords and chargers, so they do not live on the backsplash.
- Zone your outlets: put power where the task happens, especially in the coffee and prep zones.
- Go vertical: store trays and cutting boards upright, and stack less on countertops.
- Monthly reset: remove the tools you no longer use, and give the rest a labeled home.
What shelving or hidden storage options save counter space?
Tall pantry towers, spice pull-outs, and tray dividers save counter space because they keep “daily reach” items inside the cabinet box, not spread across the room. If you have a tight run, even a narrow 3-inch to 6-inch pull-out can turn a filler into real storage.
Hidden storage that works well in NYC includes toe-kick drawers, roll-out trays behind doors, and lift-up wall cabinet doors that stay out of your face while you prep.
Incorporate Future-Proof Features
Future-proofing means you plan power, ventilation, and flexibility now, so you do not rip out finished work later. In NYC, this also means coordinating early with your building rules, approvals, and inspections.
How do smart appliances and outlets future-proof a kitchen?
Smart appliances can save time and reduce waste, but only if your kitchen can support them. Electrical planning is the hidden backbone of modern kitchen design.
- Small-appliance circuits: the NEC has long required at least two 20-amp small-appliance branch circuits to serve kitchen and similar area receptacles, which supports real-world loads.
- GFCI protection: recent NEC updates expanded GFCI requirements to cover all receptacles in dwelling unit kitchens, not just countertop outlets (confirm what edition your NYC project is permitted under).
- Island power planning: island receptacle rules have changed in recent code cycles, so plan the rough-in early and confirm placement with your inspector and countertop fabricator.
If you are using a kitchen design tool, add outlets and switches to the plan early. It is much cheaper to move a line on a drawing than to move a circuit after tile is installed.
How can I design a kitchen that adapts to evolving needs?
I design kitchens with flexible zones so the room can change as your household changes. That includes drawer-based storage, pull-outs, and cabinet interiors you can reconfigure without new cabinetry.
- Universal comfort: consider at least one lower work surface or a pull-out work board for baking and seated prep.
- Safer cooking: if you are open to it, induction cooking reduces open-flame risk and pairs well with strong ventilation planning.
- Modular storage: choose adjustable shelves and drawer dividers so the cabinet system can evolve.
This is where a good kitchen designer earns their fee, they translate how you live into dimensions that still work ten years from now.
Focus on Non-Visual Design Elements
Ventilation and noise control are the upgrades you feel every day, even though they do not show up in the backsplash photo. These details also protect finishes and improve comfort in open-plan apartments.
Why is proper ventilation and air quality crucial in kitchens?
Cooking creates moisture, grease, odors, and fine particles. If you cook with gas, emissions can also include nitrogen dioxide, which is one reason ventilation and filtration matter in NYC homes where windows are not always an option.
As of December 2025, a Stanford-led analysis reported that switching from gas or propane cooking to electric could reduce nitrogen dioxide exposure in the U.S. by over 50%. That is a big number, and it is why I talk about ventilation and electrification early in planning.
- Vent to the outdoors when possible: ducted range hoods move pollutants out, recirculating hoods mainly reduce grease and some odor.
- Confirm makeup air: many versions of the IRC require makeup air when a hood is capable of exhausting more than 400 CFM, especially in tighter homes.
- Choose rated equipment: the Home Ventilating Institute (HVI) certifies ventilation products so you can compare airflow and sound based on tested ratings.
What are effective noise reduction solutions for kitchens?
Noise control is a real quality-of-life upgrade in NYC. You can spend top dollar on finishes and still hate the space if the dishwasher sounds like a shop vac.
- Pick quieter appliances: many brands describe 44 dBA or lower as “quiet,” while the low 50s are more noticeable in open layouts.
- Use soft-close hardware: soft-close hinges and slides reduce the sharp impacts that echo in hard-surface kitchens.
- Add absorption where it fits: upholstered stools, a washable runner, or acoustic panels in a dining nook can take the edge off reverberation.
- Isolate vibration: proper leveling, anti-vibration pads, and correct cabinet fastening help more than people expect.
On recent remodels, the biggest change came from pairing quieter appliances with soft-close cabinetry and a ventilation fan rated for lower sound at the airflow we needed.
Last thoughts
These seven rules shape lasting kitchen design that works in real NYC life. They guide workflow, storage, layout, lighting, and material choices so your renovation budget goes into daily comfort, not regret.
If you want help turning these rules into a buildable plan, a kitchen designer and a licensed contractor can coordinate the details, from kitchen cabinet design to permits and scheduling, so your modern kitchen design looks great and functions even better.
FAQs
1. What core kitchen design rules do experts follow?
Experts say plan the layout, light, and flow, to make tasks easy and the room calm, good kitchen design balances beauty and use. They set clear work zones, pick surfaces that feel warm to the touch, and place storage where you reach it. Many pros mix clean modern kitchen design ideas with classic kitchen designs to keep the room timeless.
2. How do I pick kitchen cabinet design and design of kitchen wardrobe?
Choose kitchen cabinet design and design of kitchen wardrobe that fit your daily work, match your color plan, and follow your kitchen design decorating ideas.
3. Should I hire a kitchen designer or use a kitchen design tool?
A kitchen designer brings real skill, local rules knowledge, and trusted tradespeople, they help you avoid costly mistakes. A kitchen design tool can test layout fast, and show scale before you buy. Many homeowners search for kitchen designers near me, then use tools to refine their plan.
4. Where can I find kitchen design ideas or design by kitchen inspiration?
Look at real projects, shop displays, and expert guides, to see how light, color, and texture work together. Use the best kitchen design ideas that fit your life, study design by kitchen examples, and adapt the kitchen designs you love.