Thinking about a Beauty Salon Commercial Renovation in NYC, and already feeling the permit and budget pressure?
You want the space to look amazing, run clean, and stay comfortable, but the buildout can feel like a maze of approvals, trades, and lead times.
I’m Alex Fedin, a licensed general contractor in New York City, and I’ve been running renovations since 2000. I’ll walk you through the design, budget, and timeline essentials I use on real NYC projects, so you can make clear decisions and avoid expensive rework.
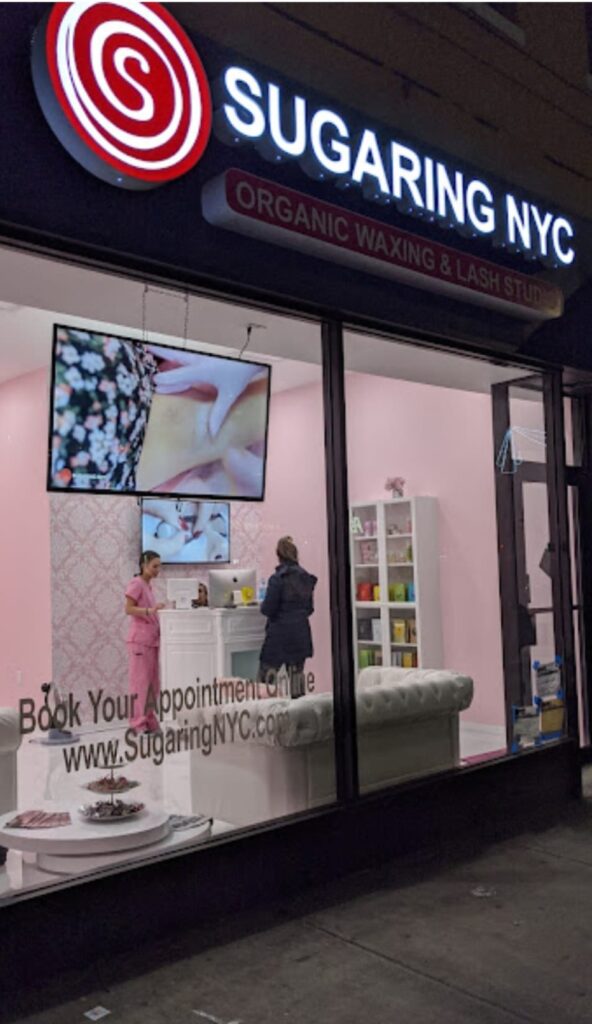
In this guide, you’ll get a realistic four-month target, as it’s been done at Sugaring NYC beauty salon in Brooklyn, plus what to do first for permits, HVAC, electrical, finishes, and final sign-off.
Key Highlights
- Set a realistic timeline: A fast NYC salon buildout can hit about four months, but only if you lock drawings early, answer DOB objections quickly, and schedule inspections the moment each phase is ready.
- File DOB early and clean: Use DOB NOW: Build, submit complete drawings (fire safety, ADA, ventilation), and keep your responses organized. A recent NYC Comptroller audit found jobs often sit with the applicant for most of the review cycle due to corrections and missing info, so your paperwork speed matters.
- Budget with NYC reality in mind: NYC interior construction costs are often priced per square foot, and retail interiors commonly land well above “cosmetic refresh” pricing once you add MEP upgrades, accessibility work, and premium finishes.
- Ventilation is a business feature: Plan local exhaust where odors and chemicals live (wax, nail services, cleaning products) and keep maintenance access simple with smart diffuser placement and access panels.
- Power and life safety drive approvals: Tools with high wattage loads need a dedicated electrical plan, and your opening date depends on passing fire alarm testing and final inspections, plus securing the right Certificate of Occupancy pathway.

Project goals, timeline, and overall scope
The goal is simple: a salon interior that feels welcoming, supports your brand, and lets staff move fast without bumping into each other.
For most NYC spaces, that means a full interior renovation, HVAC, electrical, framing, finishes, and compliance with franchise brand standards, plus sanitation upgrades that make daily cleaning quicker.
When you aim for a four-month timeline, you have to treat planning like construction. That starts with clear drawings, a tight scope, and a calendar that matches how DOB, inspectors, and trades actually work in NYC.
- Define capacity goals: Number of treatment rooms, expected daily appointments, and how checkout flow works during peak hours.
- Lock the “messy” rooms early: Back-of-house, shampoo stations, and chemical storage should be settled before you pick paint colors.
- Build around maintenance: Access panels, shutoff valves, and service clearances save you money every year after opening.
- Protect the client experience: Noise control, lighting comfort, and odor control should be designed in, not patched later.
Existing space condition and key challenges
Older NYC buildings are full of surprises, especially in Brooklyn. Before you promise a four-month grand opening, you need a real look at the existing conditions.
Start with the systems you cannot see: electric, plumbing, and ventilation paths. Older panels, undersized feeders, and patched plumbing can force upgrades that change both budget and schedule.
Also, treat environmental checks as a first-step item, not a “maybe later.” Under New York State asbestos rules, renovation work generally requires an asbestos survey unless the building falls into a clear exemption category (for example, original construction on or after January 1, 1974).
Old buildings reward planning. If you skip the due diligence, the schedule will slow down later.
- Asbestos: Get an asbestos assessment before demolition so you can price abatement correctly and avoid stop-work surprises.
- Hidden chases and ceilings: Confirm where ducts, sprinkler mains, and electrical runs can go before you finalize room sizes.
- Structural limits: Check slab penetrations, vibration issues (common near trains), and any landlord rules for roof or shaft connections.
- Material lead times: Specialty lighting, custom millwork, and branded finishes can become the real schedule driver, even more than labor.
Coordination with franchise standards and brand aesthetics
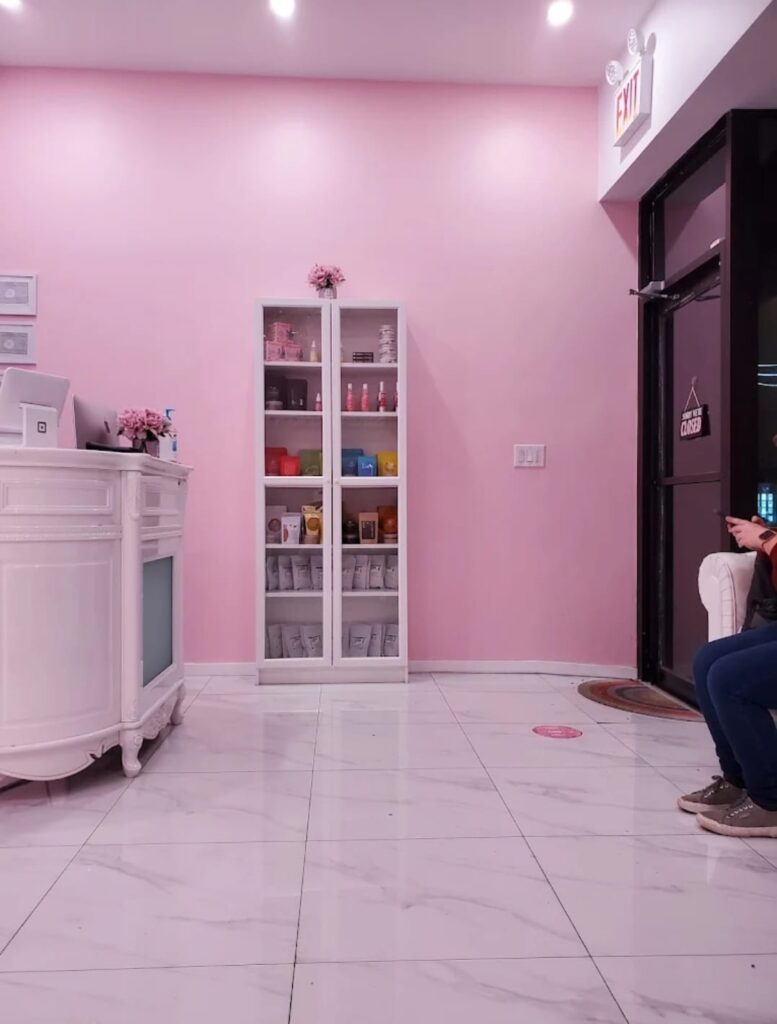
Franchise standards guide every finish, fixture, and color choice. Sugaring NYC’s signature pink is a great example, it needs to show up consistently across paint, tile, and millwork so the space reads “on brand” the moment a client walks in.
Salons by JC also gives franchisees budget management help, plus room for design input. The win is balancing brand consistency with what your real building needs for code and durability.
Here’s the coordination approach that keeps projects moving:
- Get brand approvals early: Submit finish boards and key elevations before you order tile, doors, or millwork.
- Keep one “source of truth” set: One coordinated drawing set for HVAC, electrical, framing, and reflected ceiling plans prevents field conflicts.
- Choose cleanable materials: Non-porous surfaces in wet and chemical zones help sanitation and reduce long-term maintenance.
- Plan the photo moments: Reception wall, signage zone, and lighting temperature should be intentional, this supports marketing from day one.
Planning, Design & NYC D. O. B for a Beauty Salon Commercial Renovation
If you want your design, budget, and timeline to stay predictable, file NYC Department of Buildings permits early, and file them clean.
Your drawings are the foundation. When they clearly show life safety, ventilation, accessibility, and scope, you cut down objections and keep your buildout calendar tight.
Watch a quick DOB filing walkthrough video
Filing process, drawings, and approvals with NYC Department of Buildings
I managed DOB filings for a Sugaring NYC salon in Brooklyn, and I’ve run permits and builds since 2000 with HomeRenovation4U.
DOB NOW: Build is where most of your pace comes from. DOB’s own FAQs note that plan examiner meetings can be held online, which helps keep momentum if your team is organized and ready to answer objections quickly.
- Confirm your filing strategy early: Identify the scope (layout changes, MEP changes, occupancy details) so your architect or engineer files the right job type and avoids scope “creep” during review.
- Build drawings like an inspector will read them: Clear plans, code notes, equipment schedules, and labeled systems reduce objections and back-and-forth.
- Submit through DOB NOW: Build: Track objections in one place, answer them fast, and keep your revised sheets clearly clouded and dated.
- Don’t ignore record-keeping requirements: NYC DOB has long-standing microfilm procedures for PW1 job folders, which is another reason your document set should be complete and consistent from day one.
- Use professional certification carefully: Professional Certification can speed review, but only if your licensed design pro is confident the plans meet code and can withstand audit checks.
Code compliance: fire safety, occupancy, ventilation, ADA considerations
Code compliance is where NYC buildouts win or lose time. If you bake it into the drawings, the field work gets smoother and inspections become more predictable.
- Accessible routes and doors: The U.S. Access Board’s ADA guidance highlights a 32-inch minimum clear door opening (measured with the door open 90 degrees). I plan door sizes and hardware early so we don’t rebuild frames later.
- Reception counter accessibility: The 2010 ADA Standards cover sales and service counters, and an accessible portion is typically 36 inches high maximum. If you plan this during millwork design, you avoid last-minute carpentry changes.
- Ventilation in chemical zones: For manicure and pedicure areas, the International Mechanical Code includes source capture concepts, with exhaust inlets positioned close to the point of chemical application and requirements for operating controls when the space is occupied (as summarized by the International Code Council).
- Occupancy and egress: Your layout must match your posted occupancy and exit paths. Don’t wait until final inspection to “figure out” where signage, emergency lighting, and exit access will go.
- Wet areas and electrical safety: Where sinks and cleaning zones exist, plan GFCI protection and correct receptacle placement so you pass inspections without rework.
Scheduling inspections and managing paperwork during a 4-month timeline
A four-month salon buildout is a scheduling project first. You can do great work and still miss your opening if inspections are treated as an afterthought.
Here’s how I keep it moving week to week:
- Weekly paperwork rhythm: One folder for permits, approvals, sign-offs, and test reports. If an inspector asks, you hand it over in minutes.
- Schedule inspections by “readiness,” not by hope: Call for inspection when the work is truly ready, so you don’t burn time on re-inspections.
- Track objections like punch list items: Every DOB objection gets an owner (architect, engineer, GC) and a due date.
- Close out in the correct order: Final inspection requests, test reports, and completion paperwork should be staged so the Certificate of Occupancy process is not delayed.
HVAC System Installation: Comfort, Ventilation & Code Compliance
HVAC is not just comfort in a salon. It’s odor control, humidity control, and the difference between “fresh” and “chemical” the moment someone walks in.
A good plan also keeps inspections smoother because ducts, diffusers, and access panels are coordinated instead of improvised.
Watch an HVAC installation walkthrough video
Designing and installing a new HVAC system for treatment rooms and common areas
On the Sugaring NYC salon renovation in Brooklyn, I sized HVAC for six treatment rooms and two common areas within a four-month schedule.
For salons, I plan HVAC around three real needs: stable temperature, controlled humidity, and predictable fresh air. That protects client comfort and helps staff work safely all day.
- Zoning matters: Treatment rooms should not feel like the reception area. Separate zones reduce hot spots and complaint calls.
- Make maintenance easy: Filters, dampers, and key valves should be reachable. A hidden unit with no access becomes an expensive future repair.
- Think about energy, too: In NYC, building energy rules and owner reporting obligations can influence equipment choices, so I like to discuss efficiency targets before we order major mechanical equipment.
Ventilation requirements for salon and spa environments
Ventilation is where you protect air quality, especially around wax, nail services, and strong cleaning products.
For manicure and pedicure stations, International Code Council guidance on the International Mechanical Code calls out source capture style exhaust close to the point of chemical application, with the system running continuously while the space is occupied. That’s a practical design detail you can act on early by planning station locations and duct routes before framing.
If you wait to “add ventilation later,” you usually lose ceiling space, budget, or both.
- Place exhaust where the fumes start: Capture at the station beats “hoping” the general return will handle it.
- Separate fresh air from odor exhaust: Fresh air should feed occupied zones, and exhaust should remove contaminants without short-circuiting back into the space.
- Confirm balancing and documentation: Keep airflow test and balance reports with your closeout package so final sign-off is easier.
Ceiling coordination: ductwork routing, diffusers, and access panels
Ceiling layout decides whether your build feels clean or cluttered. I coordinate HVAC with electrical, sprinklers, and lighting before the grid goes up so we don’t cut and patch later.
- Put diffusers where people feel them: Avoid blasting clients directly over the table, and avoid dead corners that trap odors.
- Keep access panels intentional: One good access panel is better than a future ceiling demolition to reach a damper.
- Prevent trade clashes: The reflected ceiling plan is where you solve conflicts early, not on a ladder during final week.
Electrical Work & Fire Alarm System
Electrical planning protects your opening date. In salons, loads add up fast, dryers, wax warmers, task lighting, washers, and everything behind the reception desk.
Fire alarm integration is just as critical. If testing and documentation are not ready, you do not open.
Watch an electrical and fire alarm walkthrough video
Full electrical layout: lighting, outlets, treatment room requirements
Plan the electrical design early so you avoid costly revisions later. Tools and stations often pull serious wattage, and you need a layout that keeps breakers from tripping during peak hours.
| Area | What to plan | Why it matters |
|---|---|---|
| Treatment rooms | Dedicated circuits for high-load tools, clean outlet placement, dimmable task lighting | Consistent service quality and fewer nuisance trips |
| Reception and retail | POS power and data planning, display lighting, backup outlet capacity | Smoother checkout and better product presentation |
| Wet zones | GFCI protection, safe receptacle spacing, exhaust fan controls | Safety, inspection success, and fewer callbacks |
As a real-world example, many professional hair dryers in the U.S. are labeled around 1875 watts, which is a big draw on a standard 120V circuit. That’s why I like to map dedicated circuits per station in the drawings, instead of relying on power strips later.
Fire alarm system installation and integration with building systems
In NYC, fire alarm work is not a DIY category. You need qualified installers and the right technician credentials for inspection, testing, and service.
The NYC Fire Department lists a Certificate of Fitness for Fire Alarm Systems Inspection, Testing and Service Technician (S-98) for technicians who perform this work in the city. I bring that requirement up early because it affects who you hire and how quickly you can schedule testing.
- Coordinate early with the building: Many salons tie into an existing building system, and you need to confirm what’s required for your tenant space.
- Document everything: Device locations, circuits, and test results should be organized for DOB sign-off and future maintenance.
- Don’t treat it as “end of job”: Fire alarm rough-in timing impacts ceilings, framing, and final finishes.
Inspection, testing, and final approval
Inspections close the loop. They prove systems meet code and let you open for business.
- Schedule NICET certified testing for fire alarm systems and keep the reports ready for final review.
- Have licensed electricians complete final electrical testing so the inspector can sign off without open items.
- Book fire alarm and electrical inspections in a sequence that matches the build, with the right people on-site to correct issues fast.
- Request the right occupancy documentation after all systems pass, since NYC requires approved sign-off before a public opening.
- Keep a clean closeout packet (permits, sign-offs, manuals, warranties, and test reports) so future repairs or franchise audits don’t become a headache.
Framing, Drywall & Interior Build-Out
Framing sets your salon’s day-to-day flow. Get the layout right, and everything after it gets easier, HVAC runs cleaner, lighting lines up, and rooms feel calm instead of cramped.
Drywall and ceilings are where the space becomes “real,” and where sound control and privacy either happen, or don’t.
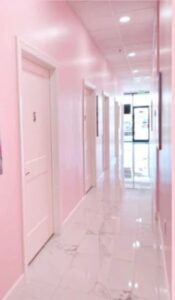
Framing treatment rooms and corridor layout
I like private treatment rooms toward the back for privacy and a quieter feel. High-turnover service areas belong closer to the entry so guest flow stays smooth.
Accessibility details should be baked into framing. ADA guidance highlights a 32-inch minimum clear door opening, and restrooms need proper turning and clearance space, so you want those dimensions locked before rough framing is complete.
- Plan corridor widths for carts: Staff should move supplies without squeezing past clients.
- Keep sightlines clean: Avoid direct views into treatment rooms from reception.
- Frame for future flexibility: Add blocking where shelves, TVs, mirrors, or equipment may change later.
Drywall installation and sound considerations between rooms
Clients ask about privacy all the time. In my experience, sound control is one of the most overlooked parts of salon remodeling, and it’s painful to fix after opening.
Many tested wall assemblies land in the STC 45 to 49 range with standard construction, and to reliably get above STC 50 you typically need extra measures, like additional layers, insulation, or resilient channels (as discussed in industry guidance around GA-600 sound-rated assemblies). That’s why I plan the acoustic approach in drawings, not just in the field.
- Seal the gaps: Acoustic sealant at perimeters and penetrations makes a real difference.
- Insulate the cavities: Fiberglass batts help reduce sound transmission through partitions.
- Control penetrations: Back-to-back outlets and large unsealed holes kill privacy fast.
Drop ceiling grid system and recessed lighting installation
A suspended ceiling grid helps you hide ducts and wiring while keeping future maintenance simple.
I coordinate recessed lighting, diffusers, sprinklers, and access panels before installation so the finished ceiling looks intentional and stays serviceable.
- Keep lighting consistent: Even spacing prevents “dark corners” that make a salon feel smaller.
- Align with room purpose: Treatment rooms need calm lighting, retail needs brighter display light.
- Protect service access: Plan access panels so future work does not damage new finishes.
Tile Work, Plastering & Painting: Creating the Signature Pink Interior
Finishes are what clients notice first. In a salon, finishes also take daily abuse, water, chemicals, rolling carts, and constant cleaning.
The best approach is choosing materials that look branded and hold up under real use.
Floor tile installation: durability and maintenance considerations
For salon floors, slip resistance and cleanability should lead. You want a floor that stays safe in wet conditions and does not stain when product spills happen.
Tile industry guidance tied to ANSI standards commonly references a wet DCOF value of 0.42 or higher for level interior areas expected to be walked on when wet. Use that as a screening number when you’re choosing floor tile for shampoo zones, bathrooms, and entry areas.
- Choose fewer grout lines where possible: Larger formats can reduce cleaning time, but confirm the floor is flat enough for the product.
- Detail transitions: Clean thresholds and base details prevent water from wicking into walls.
- Plan for repairs: Order attic stock so a future replacement matches the original batch.
Wall preparation, plastering, and smooth finish requirements
Walls in a busy salon need to look sharp under bright lighting, and they need to clean easily.
I prep by repairing substrate issues first (cracks, loose paint, moisture spots), then prime and skim as needed so the final finish is smooth and consistent across every room.
- Use washable finishes in high-touch zones: Reception, corridors, and service rooms get scuffs fast.
- Detail corners and reveals: Crisp lines make branded color look expensive, even with simple materials.
- Don’t hide moisture problems: Fix leaks and condensation issues before you close the walls.
Final paint application and brand color consistency
For the Sugaring NYC salon in Brooklyn, the final paint work focused on keeping the signature pink consistent across different surfaces and lighting conditions.
My practical tip is simple: approve the color in the actual space, under the actual lights, before you paint everything. A color can look perfect on a sample board and shift once it’s on a full wall next to tile and millwork.
- Standardize sheen by zone: Keep the same sheen on comparable walls so the color reads consistently.
- Log the approved formulas: Save the brand color references and batch info for future touch-ups.
- Protect fresh paint: Schedule final paint so heavy trades are done, then protect walls during punch list.
Doors, Moldings & Custom Cabinet Installation
 Doors, trim, and cabinetry are the “touch points” clients and staff use every day. They need to look polished and stay solid under constant use.
These details also support your Beauty Salon Commercial Renovation buildout, by improving storage, cleaning speed, and overall flow.
Installation of interior doors and hardware
Choose durable door and hardware packages, especially for high-traffic corridors and treatment rooms.
ADA guidance also covers door hardware location and usability, so I keep hardware selection and mounting heights consistent during the submittal phase, not during final week.
- Pick finishes that hide wear: Fingerprints and scuffs show fast on the wrong hardware finish.
- Plan privacy needs: Treatment rooms often need privacy latches, but still must be safe and code-appropriate.
- Confirm clearances: Door swing conflicts are easy to miss until furniture and carts show up.
Moldings and finishing details
Moldings and trim make the space feel complete, but they also take hits from vacuum bumps, mop water, and carts.
- Use cleanable profiles: Simple base and casing profiles collect less grime.
- Detail wet zones: Use materials and sealants that hold up near sinks and bathrooms.
- Keep corners sharp: Good caulk and paint work here makes the whole room look higher-end.
Reception desk, shelving units, and built-in cabinetry
I plan the reception desk around staff workflow and storage needs, because clutter kills the first impression.
For accessibility, ADA guidance for sales and service counters includes a maximum counter height for an accessible portion, and that is something you can build into millwork drawings from the start instead of retrofitting later.
- Separate “display” from “storage”: Show what sells, hide what’s messy.
- Use easy-clean materials: Edge-banded panels and durable surfaces resist daily wear.
- Add smart inserts: Pull-out trays and labeled compartments reduce staff searching time.
Final Finishing, Fixtures & Project Completion
Final finishing is where the space becomes camera-ready. This phase moves fast if your punch list is organized and your closeout documents are already prepared.
The goal is a clean handover, smooth inspections, and a salon that can open on schedule.
Hardware installation and final punch list
The punch list is your last chance to protect quality. I treat it like a checklist that trades must close, item by item.
- Document every latch, hinge, lockset, and cabinet pull with photos and notes so nothing gets missed.
- Create a completion checklist tied to the approved drawings, with a due date and a responsible trade for each item.
- Walk the site with the owner and write a clear deficiency list, then confirm fixes in writing.
- Test every door and lock, including privacy functions, and log any failures for immediate correction.
- Save serial numbers and spec sheets for major fixtures to support warranty claims later.
- Use one point of contact to control trade access and close items in a single log.
Cleaning, final inspections, and client walkthrough
Final cleaning should support inspection day. A clean space helps inspectors see the work clearly, and it sets the tone for the handover.
- Use cleaning products that match your operational goals and documentation needs. Green Seal maintains GS-37 for industrial and institutional cleaners, and keeping product data and logs can help with consistency and insurance paperwork.
- Run a full systems startup, confirm HVAC controls, verify airflow comfort in treatment rooms, and record the settings.
- Test door hardware, cabinetry operation, and access panels during the walkthrough so fixes happen before opening week.
- Complete the client walkthrough right after final inspections, then close any remaining items fast with a short return visit.
Next, I cover fixtures and final fittings as part of Final Finishing, Fixtures & Project Completion.
Project outcome: 4-month transformation and business-ready space
After cleaning, inspections, and the final walkthrough, the crew turns the site over with closeout paperwork and a clear path to opening.
In this Brooklyn project, the salon delivered a full transformation in about four months with new HVAC, new electrical, durable finishes, and custom franchise branding.
We coordinated permits, completed testing, and closed out approvals so the space can operate as a compliant, business-ready interior.
If you want a Beauty Salon Commercial Renovation that stays on schedule, the real secret is simple: lock the drawings early, keep paperwork tight, and coordinate trades like every day matters, because in NYC, it does.
FAQs
1. How long does a beauty salon commercial renovation take?
Most salon renovations run six to twelve weeks, from demo to opening. Permits, electrical work, and plumbing can add time, so plan extra weeks.
2. How much should I budget for a salon renovation?
Expect a full commercial renovation to cost about $50 to $200 per square foot, plus design and permit fees.
3. What design steps matter most?
Start with a clear floor plan, for traffic flow and work stations. Pick durable, easy to clean materials, and strong, flattering lighting. Think about the client experience, make the space welcoming, not just pretty.
4. Do I need permits and a contractor, and how do I keep to the timeline?
Yes, most commercial renovations need permits, and a licensed contractor keeps work code compliant. Use tight project management, a firm budget, and weekly check-ins to keep the timeline on track, and you will sleep better at night.
References
- https://www.nyc.gov/site/buildings/industry/filing-applications.page
- https://bluebulbelectrical.com/electrical-layout-for-new-commercial-building/
- https://bacnet.org/wp-content/uploads/sites/4/2022/06/FPE-7-01.pdf
- https://apps.usfa.fema.gov/ax/sm/sm_0263.pdf
- https://press.uchicago.edu/books/hoc/HOC_V6/HOC_VOLUME6_C.pdf
- https://www.getty.edu/conservation/publications_resources/pdf_publications/pdf/decorated_surfaces_vl.pdf
- https://campserv.emory.edu/_includes/documents/2024_design_standards_and_guidelines.pdf
- https://www.hennepin.us/-/media/hennepinus/residents/recycling/documents/project-manager-guide-building-material-reuse.pdf
- https://fpdc.caltech.edu/documents/20659/Division_One_FINAL_01072022.pdf