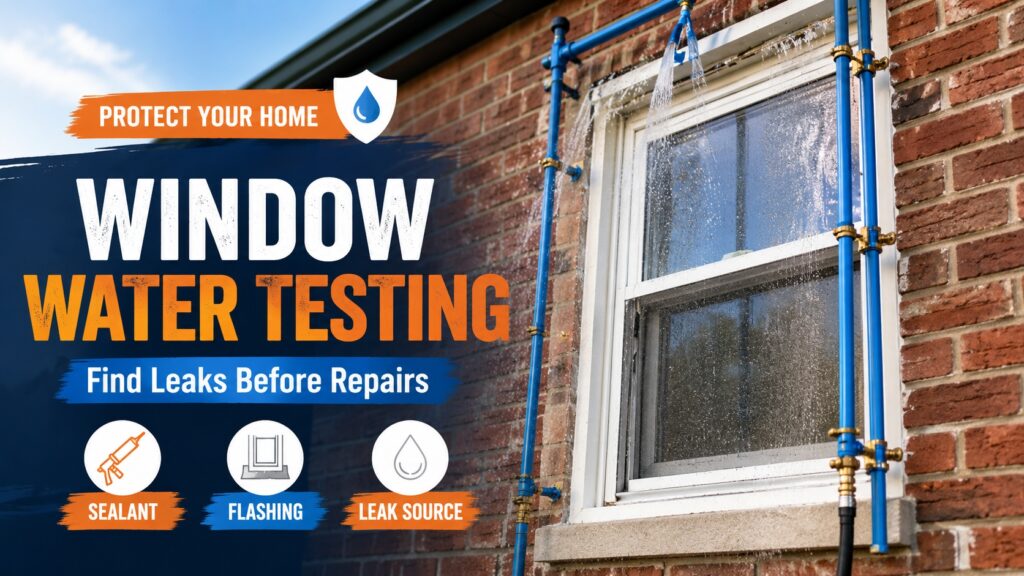
Water around a window is a warning sign. It may look like a small stain, a wet sill, peeling paint, or a damp spot near the frame, but the real problem can be hidden inside the wall. In Staten Island homes and NYC buildings, window leaks often come from failed caulking, poor flashing, old brick, cracked mortar, damaged exterior trim, bad installation, or gaps around the window opening.
Window water testing helps find where water is entering before repair work begins. Instead of guessing, a controlled water test can help check the window, frame, sealant, flashing, masonry, and surrounding wall area. That makes the repair plan more accurate and helps avoid wasting money on the wrong fix.
HomeRenovation4U provides window water testing, window leak investigation, exterior waterproofing, window opening repair, masonry-related leak repair, and renovation services for homes and buildings in Staten Island and nearby NYC areas.
What Is Window Water Testing?
Window water testing is a controlled process used to check whether water is entering around a window, frame, exterior seal, flashing area, or nearby wall surface. The goal is to reproduce the leak carefully and identify the most likely entry point.
For homeowners, the idea is simple: if water appears inside after rain, the leak needs to be traced from the outside. A proper test can help show whether the water is entering through the window itself, around the frame, above the opening, through brick or mortar, or from another nearby exterior detail.
What Window Water Testing Can Help Find
- Leaks around the window frame.
- Failed exterior caulking or sealant.
- Missing or damaged flashing.
- Gaps between the window and wall opening.
- Water entering through brick or mortar joints.
- Leaks behind siding or stucco.
- Poor window installation details.
- Water entering above the window and showing up lower down.
- Condensation problems that may be mistaken for exterior leaks.
Many window leaks are misunderstood because water travels. A stain near the bottom of a window does not always mean the water entered at the bottom. It may have entered higher up, moved behind the wall surface, and appeared where gravity finally let it out.
Why Window Leak Testing Matters Before Repair
Window leaks are often repaired too quickly and too casually. Someone sees water near the frame, adds caulk around the outside, and hopes the next rain does not prove them wrong. Sometimes that works. Often it does not.
If the leak comes from failed flashing, porous brick, cracked mortar, bad siding details, or a gap above the window, surface caulking around the visible frame may not solve the problem. It may only hide the symptoms for a short time.
Window water testing helps create a better repair plan. The test does not magically fix the leak, but it helps point the repair work in the right direction.
Guessing Can Get Expensive
When the source of a window leak is not identified, homeowners can end up paying for the same problem more than once. First comes new caulk. Then interior paint. Then drywall repair. Then another storm. Then more stains. Then someone suggests replacing the window. If the real problem is in the surrounding wall, even a new window may still leak.
A controlled water test can help reduce that guessing. It allows the contractor to inspect the area, apply water in a controlled way, monitor the interior, and narrow down the likely leak path before recommending repairs.
Common Signs You Need a Window Water Leak Test
Some window leaks are obvious. Others only appear during heavy rain, wind-driven rain, or storms coming from a certain direction. If water appears only once in a while, testing can be especially useful because the issue may depend on pressure, rain angle, or a specific exterior weakness.
Interior Signs of a Window Leak
- Water stains around window trim.
- Peeling paint near the frame.
- Bubbling drywall or plaster.
- Damp or swollen wood trim.
- Wet window sill after rain.
- Dark staining below the window.
- Musty smell near the opening.
- Mold or mildew around trim.
- Water appearing only during heavy storms.
- Repeated damage after previous repairs.
Exterior Signs Around the Window
- Cracked or missing caulk.
- Gaps around the window frame.
- Old or loose exterior sealant.
- Cracked brick or mortar joints.
- Damaged stucco around the opening.
- Loose siding near the window.
- Rust or staining near the lintel area.
- Missing flashing or poor trim details.
- Old patch repairs that keep failing.
These signs do not always prove exactly where water is entering, but they show that the window area needs a closer look.
Window Leak or Wall Leak?
Water appearing near a window does not automatically mean the window unit is defective. The window may be part of the problem, but the surrounding wall assembly is just as important.
In brick homes, water can enter through mortar joints, cracks, lintel areas, or gaps around the masonry opening. In homes with siding, water can move behind siding and appear near a window even if the actual entry point is above or beside the frame. In stucco homes, cracks and weak transitions can also send water toward the window opening.
The Window Is Not Always the Source
A window sits inside a larger opening. That opening includes the frame, exterior sealant, flashing, sill area, trim, wall surface, insulation, and interior finish. If one of those details fails, water can show up around the window even when the window itself is not the main failure point.
This is why replacing a window without checking the surrounding wall can be a bad investment. A new window installed into a leaking opening can leave the homeowner with the same water problem and a much larger bill.
Why Random Caulking Often Fails
Caulking has a place in exterior repair, but it has to be used correctly. Old caulk may need to be removed, surfaces may need to be cleaned, gaps may need proper backing, and the correct sealant should be applied to the correct joint.
Adding more caulk over old failed material is usually a short-term patch. In some cases, poorly placed sealant can trap water inside the wall instead of letting it drain out. The goal is to control water, not seal every visible line like frosting on a cake.
What Areas Are Checked During Window Water Testing?
A useful window water test does not look only at the glass. It checks the full window area and the surrounding exterior conditions. The leak may come from the window assembly, the perimeter seal, the wall, or the connection between them.
Window Frame and Sash
The frame and sash are checked for gaps, damaged corners, poor closure, worn weatherstripping, failed seals, clogged weep holes, and other issues that may allow water to enter. Operable windows may need special attention because moving parts create more potential leak points.
Exterior Sealant and Caulking
The perimeter sealant around the window is one of the first places to inspect. Over time, caulk can crack, shrink, separate from the surface, or lose adhesion. This is common around older windows, brick openings, exterior trim, and areas exposed to sun and weather.
Flashing and Waterproofing Around the Opening
Flashing is supposed to direct water away from the wall opening. If flashing is missing, damaged, buried, installed incorrectly, or interrupted by later repairs, water can move behind the exterior surface and enter around the window.
Important areas include the head flashing above the window, side flashing, sill pan area, and the transition between the window frame and the wall.
Brick, Stucco, Siding, and Surrounding Facade
The surrounding wall often tells the real story. Brick joints, cracks, stucco openings, siding seams, lintel areas, and old patch repairs can all allow water to enter. A good leak investigation looks at where the water could start, not only where it finally appears inside.
How Window Water Testing Works
The exact water testing procedure depends on the building, window type, access, and leak history. In general, the process includes inspection, preparation, controlled water application, interior monitoring, and repair planning.
Step 1: Visual Inspection
The contractor starts by reviewing the interior and exterior conditions. Inside, the inspection may include water stains, damaged trim, peeling paint, bubbling drywall, damp plaster, mold smell, and previous repair areas. Outside, the inspection may include caulk, frame joints, brick, stucco, siding, flashing, trim, and the area above the window.
This step matters because water testing should be targeted. Randomly soaking the wall is not a diagnosis. It is just making the building wet with confidence.
Step 2: Protect the Interior and Prepare the Test Area
Before testing, interior surfaces may need protection. The test area is reviewed, suspected leak points are identified, and the contractor confirms where water appeared during previous storms.
Access is also important. Some windows are easy to reach. Others may require ladders, staging, or additional safety planning. The more difficult the access, the more important preparation becomes.
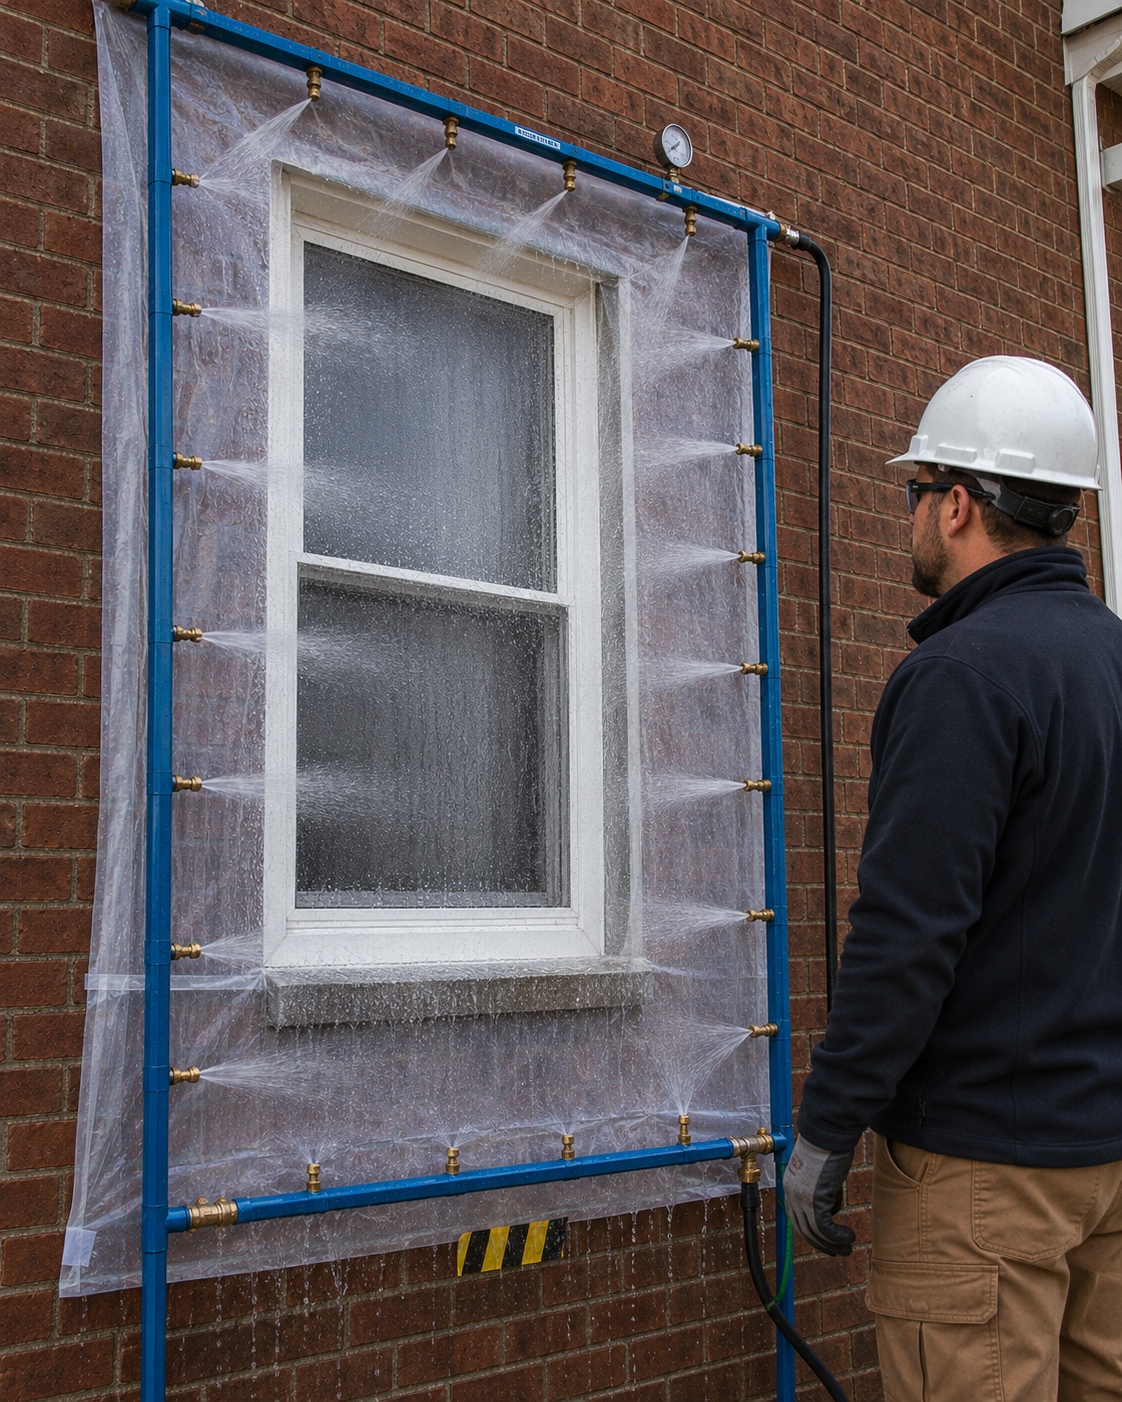
Step 3: Controlled Water Application
Water is applied to specific exterior areas around the window and surrounding wall. The goal is to recreate the leak in a controlled way. Depending on the situation, water may be applied to the lower area first, then the sides, then higher areas, or another sequence may be used based on the suspected leak path.
The test should be controlled enough to help isolate the source. Soaking everything at once can make it harder to know which area failed.
Step 4: Interior Monitoring
While water is applied outside, the interior is monitored for signs of leakage. This can include visible dripping, damp trim, new staining, moisture at the sill, water behind trim, or delayed moisture appearance.
Some leaks appear quickly. Others take time. Water may need to travel through small gaps, masonry, insulation, or wall cavities before showing inside.
Step 5: Narrow Down the Leak Source
As the test continues, the contractor compares exterior water application with interior results. If water appears only after a certain area is tested, that helps narrow the source. If the leak appears after water is applied higher up, the visible window stain may be only the endpoint.
Step 6: Create a Repair Plan
After testing, the repair plan should follow the cause. The right solution may be exterior resealing, flashing repair, masonry pointing, brick repair, stucco repair, siding repair, sill repair, window adjustment, waterproofing, trim repair, or window replacement if the window itself is failing.
Field Water Testing vs. Guesswork
Field water testing checks the installed window in the actual building. That matters because a window can perform well as a product but still leak after poor installation or weak surrounding wall details.
In real buildings, leaks are often created by the meeting point between materials: window to brick, frame to siding, trim to stucco, flashing to sheathing, sill to masonry, or old sealant to a moving surface. These transitions need inspection, not assumptions.
Why Testing Can Save Money
Testing can help avoid unnecessary window replacement, repeated caulking, repeated drywall repair, mold-related damage, repainting after every storm, and repeated contractor visits. It is much better to find the source early than to keep repairing the symptom.
When Testing Is Especially Useful
- The same window leaks after previous repairs.
- New windows still leak after installation.
- Water appears only during wind-driven rain.
- The home has brick, stucco, or older exterior materials.
- Interior renovation is planned near the leaking window.
- The homeowner wants to repaint or repair drywall after water damage.
- There is a dispute over whether the window, wall, or installation caused the leak.
- A property manager needs a clearer repair recommendation.
ASTM and AAMA Window Water Testing: What Homeowners Should Know
Some property owners, managers, contractors, and manufacturers refer to ASTM or AAMA window water testing methods. These standards are commonly used in professional building-envelope and window performance discussions.
For most homeowners, the important point is practical: recognized testing methods are designed to evaluate water penetration in a controlled way. They help avoid vague opinions and create a more organized approach to leak investigation.
Field Testing vs. Lab Testing
A lab test checks a window under controlled laboratory conditions. A field test checks an installed window in a real building. Field conditions matter because installation, flashing, sealant, wall condition, and exterior exposure can all affect water entry.
A good window can leak if it is installed poorly. A good installation can fail later if exterior sealant, flashing, mortar, or siding deteriorates. Field testing focuses on the real conditions at the property.
Formal Testing Reports
For normal residential repair, a practical water test and contractor inspection may be enough to guide the repair. For litigation, warranty disputes, manufacturer claims, condo/co-op disputes, or formal compliance matters, a certified third-party testing report may be required.
If a formal ASTM or AAMA report is needed, that requirement should be discussed before scheduling. A repair contractor can help identify and repair many leak conditions, but formal third-party certification is a different scope.
Common Causes of Window Water Leaks in Staten Island Homes
Staten Island has many older homes, brick homes, additions, renovated windows, patched masonry, and exterior openings that have been repaired more than once over the years. That creates many possible leak paths around windows.
Aging Brick and Mortar
Brick homes can allow water through cracked mortar, open joints, porous masonry, lintel areas, and old patch repairs. The water may not enter directly at the window frame. It may come through masonry above or beside the opening and then show up near the interior trim.
Poor Window Installation
Window installation problems can include missing flashing, poor sill detail, gaps around the frame, weak exterior sealing, incorrect foam use, poor alignment, or unfinished exterior trim. Even a quality window can leak if the opening was not prepared and sealed properly.
Failed Caulking and Sealant
Exterior sealant breaks down over time. Sun, cold weather, moisture, movement, and age can cause caulk to crack, shrink, detach, or separate from brick and frame surfaces. Once the seal fails, water can enter during storms.
Missing or Damaged Flashing
Flashing is one of the most important parts of the window opening. It helps direct water away from the wall and out of the assembly. If flashing is missing or poorly installed, water can move into the wall and damage the interior.
Wind-Driven Rain
Some leaks appear only when rain hits the wall at a certain angle. A window may seem fine during light rain but leak during a storm with strong wind. This is one reason controlled testing can be useful: the test can focus on the areas most likely to fail during pressure and wind-driven rain.
Condensation Mistaken for a Leak
Not every wet window is caused by exterior water infiltration. High interior humidity, cold glass, poor ventilation, or temperature differences can create condensation. A good inspection should consider this possibility, especially if moisture appears without rain.
Window Water Testing for Different Property Types
Window leaks happen in many types of buildings. The testing approach may change depending on the property, access, window type, exterior material, and leak history.
Single-Family Homes
In single-family homes, window leaks often show up around bedrooms, kitchens, living rooms, basement windows, and second-floor windows. The cause may be old caulk, masonry issues, siding problems, or water entering around the exterior opening.
Brick Houses and Older Homes
Older brick homes need careful attention to mortar joints, lintel areas, sill conditions, old sealant, and previous repairs. Water can travel through small masonry defects and appear inside at the window trim.
Commercial and Multi-Unit Buildings
Commercial buildings, apartment buildings, condo buildings, and co-op properties may need window water testing when leaks affect tenants, offices, storefronts, or common areas. These projects often require more coordination, access planning, and documentation.
New Window Installations
If newly installed windows leak, testing can help determine whether the issue is the window, the installation, the flashing, the surrounding wall, or exterior finishing. This is important before blaming the product or paying for another replacement.
What Happens After the Window Water Test?
The goal of window water testing is a repair plan that makes sense. After the test, the homeowner should understand the likely source of the leak and what type of repair is needed.
Possible Repair Options
- Remove and replace failed exterior caulking.
- Repair or improve flashing around the window opening.
- Repair gaps around the window frame.
- Repoint damaged brick or mortar joints.
- Repair cracked stucco near the opening.
- Fix siding or trim details.
- Repair or replace damaged sill areas.
- Improve exterior waterproofing around the opening.
- Repair interior water damage after the leak source is fixed.
- Replace the window if the window unit itself is failing.
The repair should match the cause. Replacing the window will not fix bad brick. Repointing mortar will not fix a defective window sash. Caulking the frame will not fix water entering from the wall above. The test helps avoid that kind of repair roulette.
How Much Does Window Water Testing Cost?
Window water testing cost depends on the number of windows, height, access, building type, equipment setup, leak complexity, documentation needs, and whether repair work is included. A ground-level window in a single-family home is very different from a second-floor window, a commercial building, or a hard-to-reach exterior wall.
Main Cost Factors
- Number of windows being tested.
- Height and exterior access.
- Interior access and protection needs.
- Brick, siding, stucco, or facade condition.
- Whether ladders or staging are required.
- Whether the leak is active or intermittent.
- Whether previous repairs hide the problem.
- Whether formal documentation is required.
- Whether repair work is requested after testing.
Testing Cost vs. Repair Cost
Testing and repair are usually separate parts of the project. The test helps identify the likely problem. The repair cost depends on what is found.
For example, a failed sealant joint may be a smaller repair. Missing flashing, masonry damage, or a poorly installed window opening may require a larger scope. The point of testing is to avoid paying for the wrong scope.
Choosing a Window Water Testing Company Near You
If you are searching for window water testing companies near you, look for a contractor who understands both windows and exterior building conditions. A window leak can involve the window, but it can also involve masonry, siding, flashing, trim, waterproofing, or interior repair.
Questions to Ask Before Hiring
- Do you inspect both the window and the surrounding wall?
- Do you test installed windows in the field?
- Do you check flashing, sealant, masonry, trim, and exterior openings?
- Can you recommend repairs after the test?
- Do you handle exterior waterproofing and repair work?
- Can you work on brick homes in Staten Island?
- Do you repair interior damage after the leak source is fixed?
- Can you explain whether window replacement is actually needed?
Why a Renovation Contractor Can Help
A test-only provider may identify the issue but not repair it. A renovation contractor who understands windows, exterior openings, masonry, waterproofing, trim, and interior repairs can move from diagnosis to a practical solution.
For many homeowners, that is the real goal. They do not just need to know that water is entering. They need the leak fixed properly so the wall, trim, paint, and interior finishes stop getting damaged.
HomeRenovation4U Window Water Testing Services in Staten Island
HomeRenovation4U helps homeowners and property owners in Staten Island identify and repair window leak problems. Services may include window water testing, leak investigation, exterior sealant repair, flashing repair, masonry-related leak repair, waterproofing, window replacement when needed, and interior repair after the source of water is addressed.
If water appears around your window after rain, do not wait until the next storm makes the damage worse. The sooner the leak is tested and traced, the easier it is to plan the right repair.
HomeRenovation4U can inspect the window area, perform water testing where appropriate, and recommend a repair plan based on the actual source of the leak.
Frequently Asked Questions
What is window water testing?
Window water testing is a controlled method used to check whether water is entering around a window, frame, exterior seal, flashing, or surrounding wall area. It helps identify the likely leak source before repair work begins.
How do I know if my window is leaking?
Common signs include water stains, peeling paint, bubbling drywall, wet trim, damp sills, mold smell, or water appearing around the window after heavy or wind-driven rain.
Is the window always the cause of the leak?
No. Water near a window can come from the window itself, but it can also come from brick, siding, stucco, flashing, old sealant, or the wall above the opening.
Can water testing show where the leak starts?
A properly performed water test can help narrow down the likely source by applying water in a controlled way and monitoring where moisture appears inside.
Should I replace the window if it leaks?
Not always. If the leak comes from flashing, sealant, masonry, or the surrounding wall, replacing the window may not solve the problem. Testing helps determine the right repair.
Do you provide window leak repair after testing?
HomeRenovation4U can inspect the leak, perform window water testing where appropriate, and recommend repairs such as resealing, flashing repair, masonry repair, waterproofing, or window replacement if needed.